Based on the results of many experiments, it is clear that making unique and non-standard souvenirs with your own hands is a very exciting and interesting job. It promotes the development of flexible thinking, creative taste and aesthetic imagination.
Even small children can take part in such a cognitive process, because making crafts from improvised materials with their own hands takes a long time even for those who are not assiduous and not very obedient.

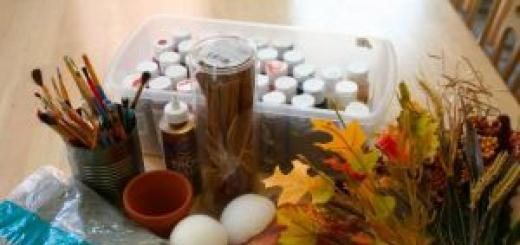
For production, any materials of natural and artificial origin are used. After all, available raw materials are always available and do not require any waste.

And masterpieces that are made from unnecessary or unsuitable materials are fully competitive with store-bought analogues, since they have no analogues. Such products will organically fit into any interior, which will add exquisite originality to it.

What crafts can be made from improvised materials?
- a variety of photo frames;
- coasters for hot cups;
- many different toys;
- decorations for every taste and color;
- key holders;
- original souvenirs using quilling technique;
- various candlesticks;
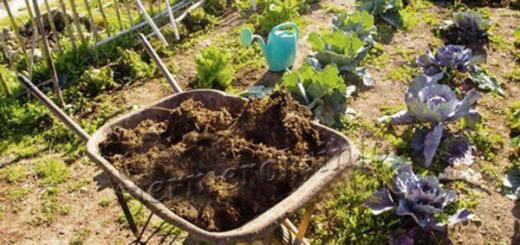
- skillful crafts for flower beds and garden plots;
- designer suits and dresses for matinees;
- design of a playground for children;
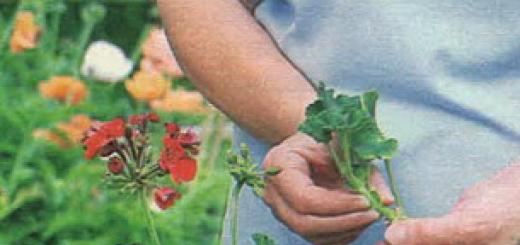
- graceful decorative flowers;
- interesting decorations;
- and many other various design masterpieces.


To make it easier to make souvenirs with your own hands, photos of crafts from improvised materials that can be found on the World Wide Web will help with this. There is no need to copy, you just need to understand the technique and do something of your own.

Using the same principle that postcards are made, it is possible to make a bright panel from paper and cardboard. But in this case, to make the souvenir look complete, you also need to think about a frame that can be made from various materials.

Instructions for crafts using improvised materials
Let's take a closer look at the example of crafts made from plastic bags - a kite, which kids love so much. For manufacturing, you need to prepare:
- 2 polyethylene bags;
- 2 skewers;
- scotch;
- black marker;
- scissors;
- fishing line, which can be seen with strong threads.

The process of creating a masterpiece:
Straighten the bag and place skewers on it, as if in a cross, but the longitudinal one should be a third higher, from the middle. Now, using a marker, you need to draw lines that connect the ends of the skewers.

Then, it is advisable to cut out the resulting figure. The skewers are glued to the bag with tape.

From the second plastic bag, you need to cut a piece, 4-5 cm wide, of any length - for the tail of the snake. It is possible to make a tail from several short pieces of bags, first combining them with tape. After this, you should tie the tail to the lower half of the flying kite.


At the end, you need to make a hole in the place where the skewers intersect, and securely tie the fishing line there. Ready!

Step-by-step making of crafts for beginners
To make a craft - a goose made from Kinder eggs, you will need:
- yellow eggs from kinders;
- buttons: 1 for the nose, 1 for the tail and 2 for the eyes;
- ribbon;
- awl;
- elastic thread;
- glue.

The process of creating a masterpiece:
Using a preheated awl, all the eggs are pierced, one opposite hole at a time.

Then the elastic is threaded from the ponytail to the head. Next, you need to put on the nose button and thread the elastic in the opposite direction, through the other hole.

Since both ends of the thread appear in the tail, it is advisable to secure them using a button. Now you need to glue in the eyes and strengthen the button on the tail of the caterpillars. In this way it is possible to produce a whole family of similar caterpillars.


Master classes on crafts from improvised materials
For a cardboard Christmas tree you need to prepare:
- cardboard;
- glue;
- scotch;
- paints, markers, pencils;
- scissors;
- glitter, stickers, or something else - for decorations.

The process of creating a masterpiece:
The cardboard must be folded in half and cut where it bends. The halves that came out are folded in half again.


On one piece, on the opposite side of the fold, half of the Christmas tree is drawn.

The sheets are folded together and cut along the drawn line; This is how you get two identical Christmas trees. Then you need to secretly mark the centers of both Christmas trees.

On one Christmas tree, an incision is made from the top to the middle along the midline, and on the second, from bottom to middle. Now, it is advisable to insert the Christmas trees into the cuts, and you get one lush Christmas tree.


To make the Christmas tree more stable, tape is used to glue both halves together.

Pencils, felt-tip pens, glitter, paints, etc. are used to decorate the Christmas tree. At this stage, everything that only the imagination suggests is done.


Conclusion
Every parent who loves their child sooner or later thinks that it is useful for the child to do at least something with his own little hands.

After all, gadgets take up more and more space in children’s lives, while real, exciting activities are of much higher value. That’s why making crafts from scrap materials will be an ideal activity for kids and adults.

Photos of crafts from improvised means


If you have a couple of free evenings, why not start making crafts for the kitchen and home? After all, you can create a bunch of useful or simply beautiful little things with your own hands from improvised, natural and even waste materials. In this material, we presented 50 inspiring photos and 12 super ideas with step-by-step master classes on making decorative items, storage accessories, kitchen utensils and more.
Idea 1. Tablet stand made from a cutting board
Watching your favorite TV series on your tablet or peeking at a recipe book while cooking will become easier if you make a special stand for this from... an ordinary cutting board. Making this kitchen craft with your own hands will take no more than two hours, and it will be used every day.
To make a holder for a recipe book or tablet you will need:
- You can use an old cutting board or buy a new one (wood is best, but bamboo will work). Its size should not be much larger or smaller than the tablet.
- A small wooden plank, or better yet, a piece of molding (this is what will hold the tablet/book).

- Another block of wood or plywood from which you can cut a sharp triangle;
- Paint or stain in the desired color, for example, to match the countertop, facades or kitchen apron ;
- Paint brush or staining rag;
- Jigsaw or saw;
- Wood glue or any other strong adhesive.
Instructions:
- Using a saw or jigsaw, cut your strip or molding to the desired size (the width of the board), sand the edges with sandpaper, then simply glue it to the bottom of the board.

- Cut a support for the stand from a piece of wood in the shape of an acute triangle with a right angle as in the photo below and glue it too.

The angle of inclination of the holder will depend on the inclination of the hypotenuse of the triangular bar

- Paint the entire piece following the paint manufacturer's instructions and leave to dry.


- If desired, the handle of the resulting stand can be decorated with jute rope or ribbon. This way, when the stand is not needed, you can hang it on a hook.
Also, the craft can be further decorated - for example, by artificially aging it as in this master class, by drawing inscriptions, by burning a design, or by covering it with slate paint. In the following selection of photos you can get ideas for decorating original cutting boards.


Idea 2. Jute coasters
If your kitchen (or, for example, a country or summer kitchen) is decorated in a rustic, Mediterranean, rustic or marine style, then you will probably like this kitchen craft idea. In just a couple of hours you can make coasters for plates for the whole family and guests with your own hands.


To make one substrate with a diameter of 33 cm you will need:
- 10 meters of jute rope 1 cm thick (sold in construction and hardware stores);
- Hot glue gun;
- Scissors.
Instructions:
Just start rolling the rope in a circle, applying glue to small sections one by one and fixing them for a while. Once the mat is formed, cut the end of the rope and glue it down.

Idea 3. Organizer for cutlery and kitchen utensils made from cans
Tin cans cost nothing, but they are durable, easy to clean, and their shape is just right for storing all kinds of spatulas, ladle, forks, spoons and other utensils. If you put in a little effort and creativity, you can make a convenient and cute organizer out of them, which, even if it doesn’t fit into the interior of a city kitchen, will definitely fit in at the dacha. You can also use an organizer made with your own hands from cans to store tools, brushes, felt-tip pens and other small items.

Stand for spoons and forks made from cans
To make such a stand for spoons and forks, you will need:
- 4 or 6 clean and dried cans, without lids or burrs;
- Acrylic paint for metal or enamel paint (it will protect the cans from rust);
- Several wood screws and a screwdriver;
- Thick nail and hammer;
- Furniture handle or leather strap with fittings;
- A small wooden plank.
Instructions:
- Paint the jars inside and out and let them dry for one day.
- If necessary, saw the wood to the desired size, sand it, clean it and finally paint it (not necessarily to match the cans).
- Take a nail and a hammer and make a hole for the screw in all the cans.
Tip: To make this process easier and not damage the paint layer, place a small block on the table using a clamp, then wrap the block in felt and only then put a jar on the block (see the picture in the lower left corner in the next photo collage)

- Place the cans against the board and align them the way they will be mounted later. Mark the location of the holes on the board with a pencil.
- Make small holes in the board where the marks were marked, using a hammer and nail.

- Screw a screw into the hole of the first can to attach it to the board. Repeat the procedure with all remaining jars.
- Finally, install a furniture handle or leather strap on the end of the wooden board using the same self-tapping screws. Ready!

Here are a few other deco ideas and modifications to the design of cutlery stands made from cans.


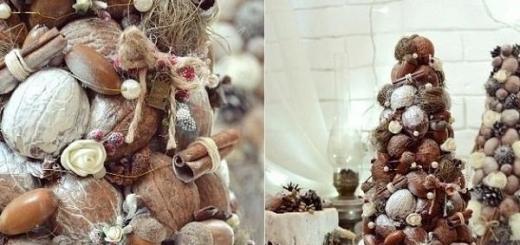
Idea 4. Topiary for kitchen or home decor
Topiary is a small decorative tree that decorates a dining or coffee table, chest of drawers or mantelpiece. And topiary is an excellent addition to a gift, especially if you decorate its crown, say, with candies or flowers. Making such a craft with your own hands does not take much time, does not require the use of expensive materials, and even beginners can do it. Once you master the basic principle, you will be able to create topiary for any occasion, any shape and design. Take a look at our selection of DIY home decor photo ideas, you're sure to find something you'll like!


Kitchen Decor Idea for Halloween


To make this craft you will need:
- Base made of polystyrene foam, plastic or floral foam in the shape of a ball or other desired shape;
- A trunk (a straight tree branch, a pencil or any other small stick);
- Decorative elements for creating a crown: coffee beans, artificial flowers, pine cones, colored beans, etc.;
- Decor to disguise the pot filler, for example, moss, pebbles or sisal fiber;
- Flower pot;
- Filler for a pot that will fix the trunk. For example, cement mortar, the same polystyrene foam or alabaster (the best option) will do;
- Thermal glue in a gun;
- If necessary, you will need paint to decorate the trunk, base or pot. The trunk can also be decorated with ribbon or twine.
Basic instructions:
- To begin with, it is advisable to paint the base in the color of the crown elements so that possible bald spots are not noticeable. You can also paint the trunk and pot and leave them to dry.
- Cut a hole at the base of the crown, a couple of centimeters deep, for the trunk, fill it with glue and secure the trunk.
- Take the base of the crown and start gluing the decorative parts one by one. The principle of action at this stage is simple: first, large parts are glued, then medium-sized and, finally, small elements fill in the bald spots. You need to glue the decor quickly, before the glue is absorbed into the base.
- Dilute the mixture to fix the trunk in the pot according to the manufacturer's instructions and fill the pot with it, not reaching a couple of centimeters to the edge. Next, insert the barrel, hold it for a while and then leave it to dry for a day.
- Disguise the filling of the pot with a decorative “cover” (you can fix it with a little glue).
Idea 5. Serving board-tray
But the idea of an unusual serving board-tray, which, although not a cutting board (intended for displaying food only in dishes), can nevertheless be very functional. For example, it can be used to beautifully serve snacks, drinks (olives, pistachios, nuts, chips, etc.), sauces, honey, sour cream, jam. Thanks to the slate part, while the board is not being used for its intended purpose, it can simply be hung on the wall and used for writing.
To make this DIY kitchen craft you will need:
- Wooden board 5 cm thick;
- Stain of the desired color (for example, to match the countertop);
- Sponge, rag or brush;
- Chalkboard paint;
- Two furniture handles and wood screws for fastening them;
- Jigsaw or saw;
- Screwdriver or screwdriver;
- Ruler, pencil.
Instructions:
- Cut your board to the desired size using a hand/power saw or jigsaw. In this master class, the board is 60 cm long, but you can make it shorter or longer.
- Stain your board according to the manufacturer's instructions and let dry.

- It's time to paint the inside. To do this, first apply masking tape along the edges of the board to limit the painting area. Next, apply slate paint (in this case, you use paint in a can) and let it dry.


- Screw the handles to the edges of the board.

You can replace furniture handles with leather straps, paint the board a bright color, burn a design onto it, or attach two “legs” to the back of it.


Idea 6. Stand for mugs and glasses
If you're the type of person who collects wine corks (either for fun or in the hopes of one day making something useful out of them), then you'll love this craft idea.

To make one mug stand you will need:
- 8 corks (accordingly, to make a set of 4 stands you will need 32 corks);
- A roll of cork board, mat or coaster (for cutting out the base of the coasters);
- Hot glue;
- Leg-split.
Step 1: Lay out your corks in pairs in a square format as shown in the photo below. Using hot glue, apply a bead of glue between the two corks and press them together for 30 seconds. Repeat the procedure with all other pairs.

Step 2. Cut a square from sheet cork (board, rug) corresponding to the size of the future stand. Next, apply thermal glue on it, wait 15-20 seconds. and glue your blanks.

Step 3: Fill the gaps between the corks with glue and let it dry. For better adhesion of the glue to the corks, you can put some kind of press on the workpiece.
Step 4. Wrap the craft with twine and tie a knot.

Handmade coasters for mugs, glasses and glasses can be beautifully packaged and given to a friend
If desired, the stands can be made round, triangular or hexagonal by cutting off the excess with a knife.

Using the described principle, you can make such a hot stand with your own hands. By the way, an old CD will work as a basis in this case.

Idea 7. Wall panel
Another craft idea for the home and kitchen that you can make with your own hands from wine corks is a wall panel for decorating the interior and storing notes, memorable photos and postcards.

Framed cork panel from Ikea


To work, you will only need a beautiful frame (from a picture or a mirror), paint of the desired color, hot glue and a large pile of corks. Corks can be laid out in a herringbone pattern, in a checkerboard pattern, in even rows, and in other ways that you like. If necessary, for example, if there are not enough corks, they can be cut lengthwise or crosswise. To make the corks easier to cut, you need to soak them in hot water for 10 minutes.

Other interesting ideas for making wall panels with your own hands.
Idea 8. Universal knife holder
A knife holder is a very useful kitchen gadget that helps keep your workspace tidy and keeps your knife blades sharp for longer.


Making a knife holder with your own hands is very easy - just pick up a small vase and fill it tightly with bamboo/wooden skewers, colored beans or... colored spaghetti, as in our master class.

To make a knife stand, prepare:
- A container or vase is the height of the blade of your largest knife. The shape of the container can be any, but without any bends;
- Spaghetti, lots and lots of spaghetti;
- Several large ziplock bags (or just large bags that can be tightly tied in a knot);
- Alcohol (for example, vodka);
- Liquid food coloring in the desired color (or several colors if you want to make a multi-color filling);
- Baking trays;
- Aluminum foil or old oilcloth tablecloth;
- Paper towels;
- Kitchen scissors.
Instructions:
- Make sure your container is clean and dry, then fill it tightly with spaghetti. When the container is full, remove the spaghetti and add a couple more bunches of pasta to the pile as a reserve (in case you make up for broken sticks).
- Divide the spaghetti evenly between the bags and pour enough alcohol into the bags to wet all the sticks. Next, add 10-40 drops of food coloring to each bag.

- Seal or tie your bags, then place them in additional bags to avoid leaks. Slowly shake and turn the bags to mix the coloring into the alcohol and pasta. Next, place the bag on one side and leave for 30 minutes, then turn the bag over again and leave it for another half hour. Continue soaking the spaghetti in this manner (no more than 3 hours) until it reaches the desired shade.
- Cover your baking sheet with aluminum foil, then a layer of paper towels (or oilcloth). To protect your hands from staining, it is advisable to wear gloves. Remove the spaghetti from the bags, after draining all the liquid, place them on a baking sheet in a single layer and leave to dry. From time to time, the spaghetti needs to be sorted to dry evenly.

- Once your spaghetti is COMPLETELY dry, start placing it in the container.
- Shake the filled container and smooth out the spaghetti. Insert your knives to determine the optimal filling density, adding pasta or removing excess if necessary.
- Now, using kitchen scissors or other very sharp scissors, trim the spaghetti to the desired length without removing it from the container (it's best to do this over the sink). It is important that the spaghetti does not exceed the height of the container by more than 2-3 cm, otherwise it will break quickly.

Idea 9. Jars for storing spices and bulk products
Today we will talk about an express technique for making a paper basket, which can be used to store small items (keys, stationery), yarn, as well as for an unusual presentation of fruits, Easter eggs, bread or pastries for a holiday table or as a gift.

Even a child can weave such baskets quickly and easily

You will need:
- About 15 sheets of thin A3 paper, cut in half lengthwise (this can be printer paper, a full sheet of newspaper, or even baking paper);
- A container of suitable size with straight sides (for example, a jam jar);
- Glue in stick;
- One skewer;
- Spray paint (optional).
Instructions:
- Starting at one corner, begin to roll the sheet of paper tightly around the skewer to the diagonally opposite corner to create an even and long tube. Once the tube is ready, add a few dabs of glue to the corner of the paper to hold it in place and remove the skewer. Do the same with all the remaining sheets. In this master class, 30 tubes were required to weave 2 baskets.
- If necessary (for example, if you used newspaper sheets) or if desired, paint the tubes with acrylic paint.
- Take an even number of tubes and connect them together as shown in the photo in the upper left corner. In this master class, for a basket the size of a jam jar, 6 tubes were required, for a larger basket - 8 tubes.

- Start braiding: Take one of the outer tubes (which is under the grate) and lay it over the adjacent tube, then pass it under the next tube, then run the tube again over the next tube, etc. Continue weaving by lifting the already entwined tubes vertically (from now on we will call these tubes stands).
- When 2-3 cm remains from the first working tube, increase its length. To do this, apply glue to the new tube and insert it into the remaining “tail”. Continue weaving over and over again, adding paper tubes as needed.
- Once you have weaved a base of the desired diameter (the same size as the container), place the container on it and begin weaving around it, pulling the stand tubes close to the walls.
- Having weaved the basket to the end, remove the jar and carefully wrap the end of the working tube into the weave.
- Tuck the ends of the posts inside the weave and trim if necessary. Next, you can spray paint from a can as in our master class.
Idea 11. Wall holder for towels and kitchen utensils
From an ordinary grater you can make such a convenient and beautiful holder for a towel and storage of kitchen utensils or even live or artificial plants.


From a flat grater you can make your own kitchen decor in a country, Provence or shabby chic style

To make a heated towel rail and a tray for small items you will need:
- A grater (preferably an old one, but a regular new grater will do, as long as it is metal);
- Patina for metal (for artificial aging of the grater);
- A small cutting board or just a wooden board;
- Wooden die (for the bottom of the grater);
- Glue.
Instructions:
- Following the manufacturer's instructions, cover the grater with a metal patina, for example, green as in this master class.

- Install a wooden bottom in the inside. It must first be cut to the size of the upper part of the grater. As a rule, at the top of the grater there are protrusions from metal handles; it is on them that the bottom will be attached.
- Screw the grater to the board using self-tapping screws, after making holes in it with a nail and hammer.
- Place the board on the wall near the sink, hang a towel on the handle, and put your spatulas, ladles or flowers inside.
Idea 12. Flower vase
Glass bottles for wine, milk or other drinks are almost ready-made vases that are just waiting to be painted with acrylic paints and/or trimmed.


Hand-made or making crafts with your own hands from available materials is an interesting and useful way to spend your leisure time. Many people don’t even realize that, using the simplest materials, you can make real masterpieces on your own that will adequately decorate your home interior or become a successful addition to any celebration. It is imperative to involve children in such work with their unbridled imagination and desire for creativity. In our article we will tell you in what ways it is possible to create crafts with your own hands using improvised materials. We will also consider a photo album of finished products consisting of 50 photos.
DIY crafts from pine cones
Cones are a very beautiful embossed natural material that allows you to make the most original figurines. Look at the photo at how charming the DIY pine cone crafts look in the form of a family of penguins, little owls or a busy hedgehog. All of them are made using additional materials, such as foam rubber, felt and others.
For example, a plastic bottle or a bunch of branches wrapped with tape is used as a base for a hedgehog, which is subsequently covered with pine cones. It’s important to make New Year’s crafts from pine cones with your own hands, photos of which are presented in our article. Make a ball toy, as shown in the step-by-step instructions, or a Christmas wreath that protects your home from negativity. When working with cones, it is worth considering their ability to change shape depending on dryness. We all know that when moisture gets in, the cone closes, and when it dries, it opens its “petals” again. So, to avoid deformation of the craft, you need to dip the pine cone into a container with wood glue, and then let it dry.


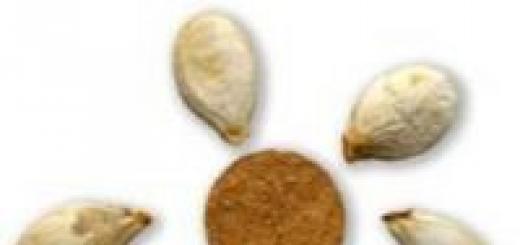
Simple DIY crafts made from cereals
Using all kinds of cereals, you can easily create a beautiful applique, and pasta will allow you to make voluminous simple crafts with your own hands, for example, a wonderful New Year tree. When making an appliqué with your child, help him initially draw a sketch, deciding which grain will be decorated in which area. Lubricate the necessary places with glue one by one and sprinkle them with the material. To decorate small gaps, make a paper tube wide at the top and narrow at the bottom. Scoop up the cereal and sprinkle it on it.


Crafts made from cereals are made with your own hands on thick paper, cardboard, and plywood. You can also use raw materials to decorate Christmas tree decorations, for example, plain balls. Do-it-yourself bead crafts are also made using this method. Glue is applied to the surface of the toy in the required pattern, then sprinkled with cereal or beads. Compositions made from pasta can be painted in the desired color using acrylic paint or spray paint.

DIY crafts from plastic bottles
Plastic bottles are often used by amateur gardeners to revitalize their garden plots. Plastic is not susceptible to moisture and this is its main advantage. Let's turn to the photographs and examine the handicrafts made from plastic bottles by home craftsmen. For example, a cute pink pig from a 5-liter bottle. It can be either a decoration for a local area or an original flowerpot. Funny penguins, decorated using paints, will be a wonderful addition to the New Year's interior. DIY crafts made from plastic bottles, chickens, ladybugs placed around the site will greatly enliven it and your children will probably like it.


DIY CD crafts
Old DVDs lying on the shelves are quite useful for making decoration toys. They can be decorated, turning them, for example, into ladybugs or other creatures. DIY CD crafts are varied. Working with glue, you can form a beautiful flower by painting it, glue a lush owl, or simply use a disk to decorate a watch dial. For the New Year's celebration, we suggest decorating a beautiful ball with an LED garland, which will decorate the interior of the room with soft tints of colors.


DIY crafts at home from salt dough
DIY salt dough crafts are very strong and also quite durable. To prepare the raw materials, you will need 1 glass of cold water and half a glass of salt. All this is mixed and flour is poured in so that a “steep” dough is obtained. In the future, you can roll it out and cut out figures, or sculpt them in volume. Finished works are dried for 5 hours in an oven (500) or in the fresh air for 2 - 3 days. Then they can be painted, varnished, etc. You can also make crafts from salt dough with your own hands in the form of hearts for Valentine’s Day, funny dogs for the coming New Year, Easter eggs and bunnies, as well as simple interior decorations.


DIY crafts from matches
DIY crafts made from matches will require special patience, perseverance, and attentiveness. They perfectly develop the imagination and allow you to create real “architectural masterpieces” in miniature, paintings, and model ships, airplanes and other vehicles. If you just want to learn how to make them, we recommend starting with simple designs to acquire some skills. For example, make a simple house, as the step-by-step sign shows, a snowflake or a small Christmas tree. When making three-dimensional crafts from matches with your own hands, at first, it is worth using glue, which makes the work easier, although experienced craftsmen often do without it.


DIY button crafts
Using buttons, you can make a variety of paintings, panels, elegantly decorate photo frames, construct New Year's toys, as well as three-dimensional figures. We presented crafts made from buttons with our own hands in photographs in our article. The photo shows a painting of an autumn tree using multi-colored buttons. Even if you don’t have many, you can draw a picture and glue the existing buttons, creating a three-dimensional image. When making a New Year's ball, buttons are attached to the foam blank using pins or simply glued. When making voluminous crafts from buttons with your own hands, use bendable wire on which you need to string the parts and form a figure, as shown in the example of a cheerful caterpillar.


DIY plasticine crafts
Modeling from multi-colored plasticine is especially interesting and also useful for children, since, in addition to the pleasure of creating wonderful figures, it promotes the development of speech. Do-it-yourself children's plasticine crafts can be in the form of your favorite fairy tale or cartoon characters. For example, it’s not at all difficult to create the currently popular heroes of the cartoon “Smeshariki”, which will certainly delight your baby. Ask him to make the arms and legs while you work on the “body”, and then fasten all the parts together. On the eve of New Year's celebrations, it is appropriate to make crafts from plasticine with your own hands with symbolic figures of dogs, snowmen, and a lush Christmas tree (see photos of the article).


Simple DIY crafts from fruits and vegetables
Various gifts of nature are an interesting material for crafts, however, they have one drawback - they are not durable and quickly deteriorate. They are formed mainly for thematic school exhibitions or when decorating holiday dishes. Also, cute DIY fruit crafts will help feed a picky child by arranging them in the form of funny little animals, just as a caring mother did by forming a cute hedgehog from pears, grapes and strawberries. Don't forget about the New Year's table. For the coming Year of the Dog, cut out a cute yellow dachshund dog from banana.


DIY pumpkin crafts can often be found in the autumn. This is partly due to the entry into our lives of the American holiday of Halloween, for which pumpkin lanterns with frightening “faces” are made. To create a craft, you can cut out a carriage from a pumpkin (based on the fairy tale “Cinderella”) or a cozy gnome house. You can create bright DIY pumpkin crafts to transform your private home area on the eve of the New Year. The vegetable must be cleaned and painted with bronze paint, turning it into a New Year's ball, holes must be made in it, and a garland must be placed in the middle.
Someone will certainly look at this collection of ideas and say that it would be easier to buy new furniture or decor. But this article is not for them, but only for true connoisseurs of unique style and handmade products. Here you will find 10 of the most beautiful interior items that you can make for your home with your own hands without spending extra money.
The best DIY home crafts from scrap materials for 2018!
1. Decoupage and other DIY furniture repair ideas
Restoring old chests of drawers and sideboards is perhaps one of the main trends of our time. Many pieces of furniture fail over time: the cabinets of tables and chairs become loose, upholstered furniture is dented and requires new “filling.” But chests of drawers and sideboards can stand for many years and bother you with their outdated appearance.
Home crafters and decoupage masters not only found a way to update the design of old furniture, but also created a fashion for using vintage “grandmother’s” chests of drawers in the interior. You will find detailed instructions on painting and decoupage in our article. .
Below are some photos of amazing home projects to inspire you.

Restoration of an old chest of drawers with replacement of handles and hand painting: 
 Painting and finishing an old cabinet with metal buttons:
  As a result, the furniture acquired an original decorative effect in the Moroccan style. Simple, like everything ingenious:
By the way, in this way you can create more sophisticated things for the home:

Decoupage and painting amazingly transform old furniture facades, but not every person has enough time and patience for this painstaking task. Therefore, the best DIY home ideas will also include remodeling furniture using duct tape to look like marble, gold, and other fancy finishes. A minimum of effort - and the most ordinary piece of furniture will turn into the main decoration of your interior.


2. Beautiful things for the home with your own hands: carpets
Perhaps the most pleasant thing about creating things for the home with your own hands is when one of the guests asks: where did you buy such beauty? A stylish rug with a zebra print (or other motif of your choice) is sure to earn such a compliment. And more than once.

The fabric can be any. The main thing is that it is not too demanding to care for: it is not afraid of moisture and is easy to clean. In this case, the master chose vinyl fabric. It is heavy and durable enough to look like a true carpet. What's more, the quality of vinyl these days is very impressive and is available in a wide range of colors and interesting textures.
All necessary materials and tools:
- Thick paper;
- Vinyl upholstery fabric;
- Scissors;
- 2 Krylon pens or regular fabric paint.
Procedure:
- Create a stencil from paper. Draw and cut out the outline of the zebra skin, then the drawing itself on it. Don't worry about your artistic talent - a zebra's skin shouldn't look uniform or symmetrical. As a last resort, the pattern can be copied from a picture on the Internet or even printed to cut out.
- Attach the stencil to the vinyl fabric and trace the outlines of the stripes with Krylon pens (apply paint with a spray or brush). After this, the stencil can be removed and you can continue painting the areas inside the contours.
- Let the paint dry and you're done! To make sure the pattern will stick, you can “seal” the rug by spraying it with a clear coat of acrylic spray paint.

Krylon pens create a stunning gold leaf effect on the surface of the fabric. In addition, the paint in them dries quickly and adheres very reliably. If you cannot buy them in your city, then use regular paint for fabrics or walls. As the next hero of our article.

He took a cheap white rug as a base and decided to give it an interesting DIY look with a chevron pattern. All he needed was thin duct tape, scissors, a thick brush and latex paint in two different shades.

Finally, another inspiring example in which a makeshift stamp is used instead of a stencil. The craftsman had a rubber bath mat, leftover wall paint (it was slightly diluted with water to achieve a vintage effect), a roller and an old IKEA wool rug. Let's look at the photo what he managed to cook from these ingredients.


3. Unusual “marble” DIY crafts (photo)

7. Turn photos into wall decor
It's much cooler than just hanging framed photos! Your personal photos or any images you like from the internet can be turned into beautiful wall art for any room. To make this decor with your own hands, you can use any of the following methods.
- Find or buy a backing. It can be a thick sheet of polystyrene foam or polystyrene foam (as in this case), a board and other available materials.
- Print the photo, having previously edited its dimensions so that they are approximately 5 cm larger than the dimensions of the substrate. These “extra” centimeters will be used for folds.
- Cut the photo and backing into pieces if you want a modular set rather than a whole painting. Otherwise, skip this point.
- Place the photo on the backing and fold the ends. The author of this product used double-sided adhesive tape to secure the photographs. You can attach it with regular glue or other available means. The surface of the photographs itself can also be treated with glue or paste for shine.

- Print the image and prepare a canvas onto which it will be transferred.
- Stretch the canvas over the frame and apply a thick layer of gel medium on it. These gels are widespread and today they can be bought at any finishing materials store.
- Place the photo on the greased canvas and press down. Leave it like this for several hours, but periodically spray it with water from a spray bottle.
- Carefully, using your fingertips alone, begin to erase the back surface of the image from the canvas. Remove all paper in this way.

The result is a beautiful one with wear and tear that will only give it a touch of vintage style. All that remains is to apply the final layer of gel medium on it as a protective coating.

For inspiration, we’ll give you a couple more ways to decorate your interior using photos.
 We use an old window frame as a photo frame. What do you think of the idea?
8. Creative homemade lampshades for lamps
Homemade lampshades made from fabric, paper, thread and other improvised means will not only decorate your home, but also bring an unusual atmosphere to it every dark time of the day.

Look for the best ideas to suit your taste in our article . The next photo shows a popular creative lampshade made of threads.

9. Succulents - living home decor with your own hands
A succulent living wall is perhaps the most amazing of all the DIY home crafts you can make. Agree: if you saw it in someone’s living room or other room design, you wouldn’t be able to remain indifferent!

Dekorin will tell you how to get such impressive and environmentally friendly decor:
- You will need a shallow wooden container for planting and a metal mesh.
- To secure the mesh to the container, use an improvised wooden frame, which can be made from small boards or wood chips. Attach to staples or nails.
- Prepare any for composition. They easily take root in the most difficult conditions and look most advantageous when you combine different shades and shapes of leaves. Common examples of succulents: aloe, various cacti, young or rock rose (Sempervivum), sedum (Sedum), rockweed (Orostachys), etc.
- Fill the container with soil and plant your chosen plants in it. Use any cactus mixture for drainage.

Here are examples of crafts for the home that you can make with your own hands using the above method.


10. DIY home crafts from glass containers
Glass bottles and jars often accumulate on balconies and in storage rooms. What they are not turned into today: lamps, candlesticks, vases, table decor... It’s simply amazing how easily they become part of a stylish interior, you just need to use a little ingenuity, as well as paints, fabrics, threads, paper and other improvised means. Last batch of photos for today. Also read:
10 best ideas on what you can do for your home with your own hands updated: March 21, 2018 by: Margarita Glushko
You can find improvised materials in any home. Some people store them on the balcony, others in the garage, others in the barn. The mentality of our people does not allow us to throw away old things, even if they don’t need them. We'll show you how to put your trash to good use. You will be surprised at what crafts you can make with your own hands from scrap materials. With a little imagination and work, you can turn useless things into real works of art. Perhaps such an activity will become your hobby, and you will be able to decorate not only your home, but also your summer cottage with incomparable products.
Plastic containers
The most affordable material is plastic bottles. At first glance, an unattractive container can easily be transformed into an original decoration for the garden or home. Even a child can handle plastic. It is enough to use scissors to cut out the shapes for future figures and secure them together.
Try making butterflies. You can decorate every corner of your garden with them or stick them on furniture in your house.

For work, prepare the following materials:
- plastic bottles;
- scissors;
- marker or felt-tip pen;
- nail polish of different colors;
- beads;
- sequins;
- rhinestones;
- tweezers;
- toothpicks.

Step 1: Make butterfly templates. Draw them yourself, cut them out from coloring books, or find them online and print them out.
Step 2. Wash the bottles and apply the templates to the plastic, tracing along the contours with a marker.

Step 3. Carefully cut out the butterfly blanks without damaging the antennae and legs.

Cover the blanks with nail polish, glue the sequins using toothpicks and tweezers, and sprinkle with beads.

Step 5. Color the back of the butterfly with a felt-tip pen or marker, and cover with colorless varnish.
Step 6. Tie a thread to the craft and hang it on a branch of a bush or tree.
Work is done.
Tropical palm trees made from plastic bottles will decorate your garden plot. Even in winter they will delight with their green foliage.

To work you will need:
- plastic bottles in two colors: brown and green;
- wire;
- scissors.
Step 1. Cut off the bottoms of the brown bottles and insert them into each other. Determine the height of the trunk yourself.
Step 2. Palm leaves are made from bottle necks. The leaves should be curly. Shape and size don't matter.
Instructions.


Master class on palm trees made from plastic containers.
Panels for home
To create a craft with your own hands from scrap materials, you don’t need a lot of time and money. Everything you need is at your home. Any unremarkable material will become the basis for a creative craft. For example, such a panel made of tubes will decorate your home.
Prepare the following materials:
- multi-colored plastic tubes;
- glue;
- cardboard;
- frame.
Step 1. Prepare cardboard and apply an image of an angel with wings to it. You can use a ready-made template taken from the Internet.
Step 2. Cut tubes of the same length in the corresponding colors (see image). Make the edges beveled.
Step 3. Glue the blanks onto the template, focusing on the Angel’s face. The edges of the tube should be directed away from it.
Note. The hair is made from short-cut straws with straight edges.
Crafts for the home from scrap materials that you can make yourself
If you want to decorate your home or garden, we will help you with this. The variety of available means has no limit. In every home there are old things or objects from which you can create a real masterpiece. Just watch how forks and spoons are transformed into works of art.

Have you seen the animated film “Despicable Me”? You have the opportunity to place the main character of this cartoon in your dacha. It is made from old tires.

Summer residents say: “Everything will come in handy on the farm.” They even create original crafts from old tires.


They are used not only to make garden figures, but also into original flower beds and flower beds.


Flower beds, flower beds and flowerpots are made in the shape of animals, birds, multi-tiered. They can be hung horizontally on the wall or installed vertically. People's fantasies are limitless.
If you are interested in such flower beds, we offer a master class on easy-to-make flower beds.


You can decorate your home with the first flowers of spring – snowdrops.

- disposable spoons;
- plasticine.

To make flowers, prepare:
- disposable spoons;
- green crepe paper;
- wire;
- plasticine.
Step 1. Break the spoons at the base.
Step 2. Stick several spoons into the plasticine to make a bud.
Step 3. Wrap the wire in paper and stick it into the plasticine that holds the petals.
Make several of these flowers and you will have a spring bouquet.
Decorate your home and cottage with original crafts. Video instructions and a selection of the simplest but most beautiful crafts will help you in the creative process.