People acquire dachas in different ways - they inherit them, buy plots with a house and remodel or complete them for themselves, or buy land in an almost open field and begin to develop virgin lands. One of our craftsmen, who decided to join country life, was puzzled by just such a process. And since the most effective way to save money is to do it yourself, that’s exactly what he did, starting small - with a summer house in the country “for the first time.”
- Country house 6x6 with built-in terrace 4x3:
- project;
- foundation;
- water supply;
- box;
- internal work.
Country house 6x6 with built-in terrace 4x3
Gonzik1
Last year I purchased a plot of land in a field (like a new holiday village). The poles were installed, electricity was supplied to the site (it took two months to complete the paperwork), a panel was installed on the pole with a meter, a machine and an outlet. This year, having saved up some money, I began construction. I decided to do everything myself, because it’s cheaper and more reliable.
DIY country house project
The craftsman created the dacha construction project with his own hands over the winter; according to his idea, this is the first module, to which he will later attach another one, combining both parts into a solid structure. Using a special program, I made a drawing that allowed me to accurately calculate the required amount of building materials.


Foundation
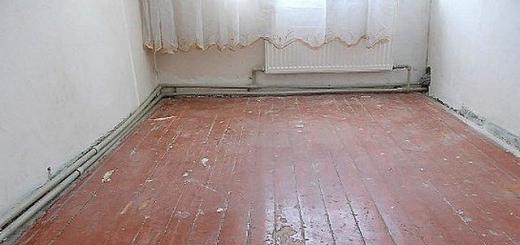
Since the house is lightweight, using frame technology and on one floor, Gonzik1 gave preference to a columnar foundation made of special concrete blocks (20x20x40 cm). His choice was also influenced by the low groundwater level (GWL) at the dacha and the excellent condition of similar foundations under neighboring buildings. Depending on the level, I used one or two blocks per pillar - removed the fertile layer, added a sand cushion, and laid the blocks. The plane was maintained using a hydraulic level. According to the craftsman, he appreciated this simple tool - it’s cheap and the measurement accuracy is excellent. The pillars were covered with roofing felt for waterproofing. With the help of relatives, the foundation was ready in three days.

Water supply
There is no place for a central water supply in the field, so the problem of water supply is a personal matter for each summer resident. Our craftsman initially planned to drill a well. Test drilling at thirty-six meters was unsuccessful - dense black clay came out instead of water. The drillers reported that only an artesian well about ninety meters long would help, and they announced an exorbitant price. Gonzik1 I got upset, imagining the scale of the problem, and decided to dig a well, as the foreseeable future has shown - the decision is the right one. Three days of work, ten rings - a column of water for one and a half rings, restored in an hour and a half.
Box
The strapping is two-layer - at the bottom there is a board 100x50 mm, at the top - 100x40 mm, impregnated with fire and biological protection, the strapping elements were connected to each other with nails (100 and 120 mm). The strapping was laid on top of the roofing felt and secured to the posts with anchors.

All frame posts were also assembled from 100x40 mm boards with nails; the walls were raised directly on site using temporary jibs. They collected only the ridge on the ground, then lifted it onto the roof. This stage took another four days.


The next thing was to install the rafters, wind boards, install the wind protection, and put the counter batten and sheathing on top. Our craftsman chose metal tiles as the roofing covering.

Gonzik1
I read that no matter which side the sheets are laid on, they are often laid from left to right. It turned out, no, the tiles are laid from right to left, otherwise the next sheet will have to be placed under the previous one, which is extremely inconvenient, especially when installing alone. The weather was not very good, it was drizzling, there was wind, it moved along the roof like a cat, trying to cling to the sheathing with its feet. All twelve sheets of tiles (115x350 cm) were laid in half a day.


After the tiles, we got to the grounding, due to which the floor joists were not completely laid. Gonzik1 I used a corner 50x50x4 mm, a connection from a metal strip 40x4 mm, plus a piece of self-supporting insulated wire (SIP).


Next, we covered the entire structure with a protective membrane, installed a door, laid floorboards on the terrace, and began covering the façade with imitation timber. The cash was immediately treated with protective impregnation. During the work, the craftsman made adjustments to the project - he made a third window, so there will be more light, and the view from the window is attractive.


Interior work
With the end of the holidays, the construction process slowed down as much as possible, since free weekends did not occur every week, but it continued. I finished with the floor - rough on OSB joists, a windproof membrane on top, stone wool slabs between the joists, sheathing, and then OSB again on it. Linoleum is assumed to be the finishing coating. The house also got another window.


I brought electricity into the house, insulated the perimeter with stone wool, a vapor barrier on top and clapboard as cladding.


The finishing process continued according to the same algorithm; contrasting trim on the window openings added decorative value to the house. All internal walls will be covered with clapboard.

Gonzik1
There are no stoves planned, the house is for seasonal use - spring, summer, autumn. I plan to install electric convectors, I have no problems with electricity there, three phases, new substation, 15 kW per site.
For all those interested, the craftsman posted a calculation of materials (all used boards are 6 meters long):
- foundation blocks 200×200×400 mm, 30 pieces;
- board 50x100 mm, 8 pieces (for the bottom layer of strapping);
- board 40x100 mm, 96 pieces - approximately 8 pieces left;
- board 25x10 mm, 128 pieces - approximately 12 pieces left;
- timber 100×100 mm, 3 pieces;
- rail 25×50 mm, 15 pieces;
- imitation timber 18.5×146, 100 pieces – approximately 15 pieces left;
- insulation, stone wool 1200×600×100 mm, 28 packages (6 slabs each) – package left;
- windproof membrane 1.6 m wide, 60 m² per roll, 3 rolls;
- vapor barrier 1.6 m wide, 60 m² per roll, 3 rolls - approximately 0.5 rolls left;
- OSB 3 2500×1200×9 mm, 15 pieces (rough and finishing floor) – approximately 1.5 slabs left;
- metal tile 350×115 cm, 12 sheets;
- lining 12.5x96 cm, 370 pieces (10 packs) - not sure it’s enough, partially used for toilet hemming, and the walls are not finished yet;
- wooden windows 1000×1000 mm, 3 pieces;
- entrance metal door 2050×900 mm, 1 piece;
- protective impregnation for wood, 10 liters - 3 liters left, but the house is covered in only one layer.
Taking into account independent construction and finishing, the estimate turned out to be quite budgetary.

Gonzik1
- Foundation - 2500 rubles.
- Boards for the frame, wind protection, vapor barrier, imitation timber (exterior decoration), lining (interior decoration), insulation, etc. - 110,000 rubles.
- Metal tiles - 20,000 rubles.
- Door - 13,200 rubles.
- Windows - 4,200 rubles x 3 = 12,600 rubles.
- Forwarding SIP to the house - 3000 rubles (with the cable itself).
- Impregnation - 3600 rubles.
I’m still planning to install electrical wiring around the house, I think I’ll spend 8-10 thousand. I don’t give the cost of nails, screws, staples for a stapler, etc., etc., because I no longer remember how much I purchased. Total: about 165,000 rubles.
For another short but fruitful vacation - I finished the electrical work, finished the interior paneling and painting, made a set for the kitchen, completed the terrace. I laid a 100x40 mm board on the terrace, took it unplaned, processed it with an electric planer, and then covered it with impregnation in two layers. Over the past winter, everything was in place, nothing moved, did not dry out or warp. The craftsman has plans to complete the second block, but this test of the pen is excellent - an excellent summer house for a family holiday.
 Lovers of nature and country life who did not have time to acquire at least a 6 by 6 frame garden house ,
but those who have a plot of land usually dream of at least some kind of shelter in their possessions. Making a home with your own hands frightens most citizens. But in vain. Today you can find a sea of information about step-by-step construction from experienced craftsmen. It will not only give you confidence, relieving you of worries and fears. Using the recommendations of professionals, you can carry out all the necessary manipulations competently and in the proper order, significantly saving on hiring a work team.
Lovers of nature and country life who did not have time to acquire at least a 6 by 6 frame garden house ,
but those who have a plot of land usually dream of at least some kind of shelter in their possessions. Making a home with your own hands frightens most citizens. But in vain. Today you can find a sea of information about step-by-step construction from experienced craftsmen. It will not only give you confidence, relieving you of worries and fears. Using the recommendations of professionals, you can carry out all the necessary manipulations competently and in the proper order, significantly saving on hiring a work team.
Of course, it’s a good idea to use the services of specialists. They guarantee (most often) quality, and the construction time will be noticeably reduced. But if the budget is limited and you want, or have a desire to try yourself in such an interesting business, nothing prevents you from rolling up your sleeves and building a garden house cheaply. An additional bonus is that for yourself everything is usually done exactly as you imagine and dream. Sometimes it can be difficult to explain your vision to hired employees.
Then the walls are assembled from the timber, fastening the joints with dowels. It is laid between the crowns. In general, insulation is desirable for each next layer. For an economy class home, they usually use a tourniquet or tow. Next, work begins on.
Roof
For rafters, a board with a cross-section of 150x25 or 100x50 mm is used. You will also need roofing felt with glassine. To make the task easier, racks measuring one and a half meters are placed in the center of the building, and a beam is attached to them. On the resulting structure are located.
Installing the roof of a one-story garden house on a frame can take only one day. The type of specific roofing material is selected individually, according to your own capabilities and taste. We must not forget about the climate characteristics of the area where the future homeowner lives. Sheets of ordinary galvanized iron are often used.
Finishing
 Using glassine
 The finished frame must be covered with glassine, and only the selected finishing material is mounted on it. It can be different, in accordance with the budget and preferences of the owner. Looks great, which is attached with self-tapping screws.
One-story frame garden houses, trimmed on the outside with wooden clapboard or. Both wooden and plastic windows are well suited to the resulting structure. Doors made of wood or an imitation of this material will look natural. indoors can also be covered. Or you can cover them with plasterboard, which is then covered with paint or wallpaper. The floor is made of planks.
Approximate cost
Garden house projects
Results
Neat frame garden house , made with your own caring hands, it is convenient to use for permanent or temporary residence. It is spacious enough to store equipment and household supplies.
It has enough space to receive and accommodate guests. And if in the future it is planned to erect a grandiose structure, then it can become the place of residence and base for an entire construction team.
It’s not that difficult to build a small 4x6 garden house with your own hands, without involving workers. The main thing is a responsible attitude towards construction, attention and patience. And, of course, strict adherence to recommendations and compliance with requirements. And very soon your plot of land will be transformed and take on the appearance of a real home.
A dacha is a truly inexpensive home to live in, and only from a certain time we began to consider it a luxury. In fact, if we remember the old days, these are small houses that are half or three times smaller than village ones, but comfortable and cozy for living at any time of the year. Therefore, it makes sense to remember how such housing is built and equipped, and to take care of the maximum comfort that is possible thanks to modern technologies and materials.
So, today we are building a small country house in which a small family can live freely. We will not touch upon the issue of financial problems and moving to a dacha, but will simply study the issue from the perspective of the possibility of living in such a dacha house of one’s own free will, but not due to circumstances.
What should a country house be like?
Everyone sets the basic requirements for a country home independently, depending on personal requirements. But today we are talking about how to furnish a home comfortably and at the same time economically.
Believe me, it's real!
So, what is a cozy and comfortable cottage for living at an inexpensive price? This is a small house that has everything for cooking and personal hygiene. It is warm in winter and cool in summer. Inside there are some household appliances, and outside, on the summer cottage itself, there is everything for simple relaxation.

It would also be nice to have several acres of land nearby on which you can plant vegetables and fruits for personal consumption, as well as a couple of small flower beds, say, just for the soul.
In fact, a person doesn’t need much to feel good. Therefore, we believe that it is possible to do without expensive intelligent systems and automated equipment. However, now you can see for yourself!
Choosing a country house project
To reduce the cost of construction as much as possible, but not to compromise on its quality, you can choose an inexpensive project. There are plenty of them on the Internet and even from the house builders themselves, who simply give some standard projects to their clients. But there is always a way to get a project and not order a house from builders, it’s simple.
You can also independently create a housing project that will be convenient for you personally in terms of the layout of the interior. The main thing when determining construction materials is that you have the opportunity to show the project to professionals to approve the feasibility of construction.

Building area: golden mean
To build an inexpensive country house, you don’t need to chase a huge area. Start from the essentials - a couple of rooms, a kitchen, a corridor, a bathroom (if it is inside the house), a small storage room. All this can fit in about 40 square meters. It will be something like an average two-room apartment, which is quite enough for a family.
The premises themselves can be divided by area as convenient, as long as the project is approved.
What to build from?
Today, such buildings can be made from a wide variety of materials:
- Glued laminated timber or logs are a modern throwback to classic construction, but it is very difficult to find a good price;
- Constructing housing from brick or cinder block may be a little cheaper, but it is worth taking into account the cost of subsequent finishing;
- You can build a house using a frame method, for example, from SIP panels. It will be average in price and good in energy saving.
Any material for the construction of a country house can be expensive or not, and if you study the market well, then you can get away from the standard cost by even 40-60%. This is true, because the cost has a regional affiliation, and is also leveled by many builders according to the “eminence” of their company.
Inexpensive building foundation
The foundation for such a house will really cost pennies. Comparatively, of course. But here it is important not just to reduce the cost of the foundation, but to be sure to choose one that will suit your residential building.
It is necessary to consider construction materials, roofing, sheathing, because all this puts weight on the foundation. But it is also worth turning to the study of the soil, because not everywhere you can pour a strip foundation and settle on this option. In some cases, if there are some problems with the soil, it will be necessary to use piles, and this will increase the cost of the process.

Inexpensive roof and roofing for a summer house
We studied most of the roofing options in a feature article earlier, and you can refer to it at any time to get the information you need.
As for the cost, today it is most profitable to install slate or corrugated sheets on the roof.
There are other options, but it is always worth starting not only from savings, but also to calculate in advance the possible service life. In this case, depending on the type of roof, you can pay attention to bitumen shingles, ondulin and other types of roofing
How to build a cottage inexpensively
The answer to the question here is very simple - build a house with your own hands! But if there are no qualifications, and a house is needed in the near future, what to do then? Just look for an inexpensive mason or a team of cobblers who will be ready to inexpensively build you a home in the country.
Anyone who has not encountered a similar question will certainly assume that this is impossible, but will certainly be wrong. Just look at how many builders today are looking for income, and you can earn at least a little from the construction of your dacha. All that remains is to determine among the total number of those proposing their candidacy those who can build with high quality and for the price tag you offer!

Choosing a plot for a summer residence
Today there are a lot of offers in dacha cooperatives. There are even absolutely cheap ones, as long as a person takes the land, and with it the obligation to pay land fees and pay for water and other indicators of civilization.
It is very good if the site is selected not only according to cost, but also according to the criteria of quality and practicality. The soil, its quality, relief, distance from the entrance, neighborhood or city, planting in the country, the ability to build quickly and without problems - all this is very important, but the list of requirements is far from complete. The main thing here is communications: electricity, water, gas, sewerage. It’s good when at autonomous substations or even with centralized supply, the main thing is that there is light and water, the rest is simpler.
Choosing a place for a building
The site for the construction of a country house should be on a hill so that the building is not affected by surface or groundwater. It is advisable to locate the house away from the road, away from unnecessary neighbors' views and road dust, and also so that maximum windows face the sunny side, because it is very good when there is light inside the home.
Installing the foundation
Since our building will be of a frame type, inexpensive, but very modern, we may not deepen the foundation very much, because this will only be a waste of money. You can choose a simple columnar foundation or a strip foundation. Platforms and filler slabs are not needed here, that’s for sure.
You can install the foundation for a frame house yourself if you have even the slightest construction experience. But if a construction team is working on the territory of the dacha, it would be better if they deal with this process, since the foundation of the house plays a very serious role.
Frame installation
The frame of a country house is erected quite simply, but strictly according to the project. It is advisable to initially provide for communication lines in order to hide them in the thickness of the floor and walls. Also, pay attention to the need for structures such as a cellar, because it can always be under the house itself.
Installation of the frame occurs in conjunction with the installation of the rafter system along the roof. If the roof of the house is based on your own design, other options are possible.

Inexpensive arrangement of a summer house
Now we need to make sure that the arrangement does not cost more than the construction. Today we will not work with the interior, as well as with accessories and decor, but we will definitely take care of ensuring comfort inside.
In terms of home improvement, all issues must be resolved with maximum practicality!
Electricity in the house
Naturally, the easiest way to provide a home with electricity is to wire it from the central line. But there are always auxiliary options. Of course, they can take the budget in a negative direction, but they still need to be remembered.
Electricity can be generated by solar panels. In this case, you will only need to spend money on purchase and installation. Next, you will receive electricity almost free of charge, albeit in small quantities.
The simplest sewage system in the country
Who said that providing high-quality sewerage on a site is very expensive? It’s just that we are used to working with septic tanks and outputs to irrigation fields, which in total costs a decent amount. You can always approach the issue from the other side and, for example, build a cesspool from used bricks or just one concrete ring. Of course, you will sometimes have to call a car to service such a local treatment plant, but you can always reduce costs by purchasing special additives for septic tanks. These are bacteria that will help ensure the decomposition of all wastewater and minimize the cost of cleaning the cesspool.
Inexpensive water supply for a dacha
Plumbing in a summer cottage is good, but if it is not there, several tanks will save the situation. One can be placed outside for summer use, and the second on the roof of the house so that you can wash dishes, take a shower, and so on inside.
If we talk about the cost of these types of supplies, then centralized water supply is always more convenient and cheaper. You pay the standard tariff on the meter and do not worry about water delivery or purification.
How to build a summer house? Selection of materials (video)
Cooking and heating
It is very important that the house is warm and that there is a stove on which to cook. This can be a single structure, for example, a modern cooking stove, which will also heat the home in winter.
Just an ordinary potbelly stove, a cast-iron stove that can be installed in any room of a country house. If not, you can build a stone stove, however, the services of a stove maker here can seriously hit your pocket.

Inexpensive life in the country: summing up
We chose an inexpensive, but decent and high-quality plot of land, and built a simple modern house using frame technology. Here we have practically a standard, but if you count in terms of area and inexpensive construction of a house, then here we are already seriously saving.
We also immediately remove expensive septic tanks, stoves, and electrical heating appliances from the budget. This gives us the opportunity not only not to spend money right away, but also not to waste money on maintaining such devices and systems. Of course, there are solutions that are much more practical than a potbelly stove or water tanks, but our task was to prove that life in the country can be comfortable and inexpensive. It seems to us that we have done this, especially if after building and arranging the house you will also tidy up and make the entire dacha area more convenient.
We won’t argue; not everyone will live in a dacha, and even in conditions to which we are not quite accustomed. But now you will have a separate private house, albeit a small one, which is valuable real estate. But in the summer this is generally the best place to relax!
Having bought your plot outside the city and decided to build a summer house on it, you will be faced with many questions related to the choice of layout, selection of suitable materials and construction. However, you have one advantage - it is much easier to build a small summer house with your own hands than a solid mansion with a complex layout. Thanks to our tips and step-by-step guides, you can build your own house by choosing a suitable photo of the future structure on the Internet. Such a house will become any vacation spot for the whole family and will not require significant financial investments from you in its construction.
Features and differences of the flight house
As a rule, a summer house is a compact one-story building or a building with an attic floor. However, even a small country house should have all the conditions for a comfortable pastime - a kitchen, rooms, a veranda, preferably a water supply with sewerage. As for the bathroom and shower, when building a country house, which is designed for living in the warm season, you can get by with a separate toilet and a summer shower on the site.
Unlike a full-fledged country house, inexpensive and lightweight building materials are usually used to build a summer house, which can be installed with your own hands without the use of construction equipment. Another advantage of using such materials is the ability to build a shallow, light foundation. This way you can save on both materials and the volume of excavation work.
Tip: for the construction of summer houses, the optimal material is wood. Installation is best done using frame technology.
Country house project

On the Internet you can find many photos of country houses, from which it becomes clear that this building can have completely different dimensions, design and layout. The choice of one option or another depends on the size of the dacha plot, the number of people who will live in the house, and financial capabilities.
If you look at the layout diagrams of summer houses, you will notice that their sizes usually do not exceed 5x6 m or 6x4 m. Larger houses are built for the purpose of year-round living.
When designing and building a country house with your own hands, you should think about its correct placement on the site. When choosing a site for a house, you should observe the following regulatory gaps:
- The building should be located at a distance of at least 3 meters from the border of the neighbors’ territory. From the border of the site, which runs along the street or driveway, the house should be located at a distance of at least 5 meters.
- It is also worth observing fire breaks from residential buildings in neighboring areas. These gaps depend on the materials from which both structures are made. So, between two stone houses there should be a gap of 6 m, between a stone and a wooden house - 10 m, between two wooden houses the distance should be at least 15 m.
- Distances from outbuildings on your site to the house being built are not standardized.
Most often, a one-story building with a veranda or terrace is chosen for a summer house, where it is very pleasant to relax on quiet summer evenings. The veranda or terrace can be open or closed. An attic space is built under the roof of a one-story house, which can be used to store country utensils, garden tools, etc.
If the area of the plot does not allow for a larger structure, and in a small one-story house it is not possible to carve out enough space for all family members, then the best option would be a summer house with an attic floor. In the photos on the Internet you can see how beautiful and proportionate such houses look. At the same time, on the ground floor you can arrange a kitchen and living room, and the attic floor can be allocated for bedrooms for all family members.
Some owners of country houses dream of making a fireplace in it. This product will not only create a cozy family atmosphere on a quiet evening, but also heat the room on cool nights, which sometimes happen even in summer.
Advice: if you decide to make a fireplace with your own hands, keep in mind that you need to lay a good foundation for it. You can build a fireplace out of refractory bricks, but doing it yourself is very difficult. But installing a metal factory fireplace is quite possible.
Selection of materials

At the stage of choosing a layout, it is worth choosing in advance the materials from which construction will be carried out. To build a summer house, you can use the following products:
- The traditional material for building a country house is wood. It is distinguished by its environmental friendliness, ease of processing and installation, and affordable price. In addition, walls made of wood create a favorable microclimate in the room, regulating humidity and saturating the air with healing phytoncides. A wooden house can be built from timber, logs or sheet materials using frame technology. The only drawback of such buildings is their increased fire hazard.
Important: in order to protect a wooden building from fire, rot and damage by insects, the materials must be treated with special impregnations (antiseptics and fire retardants).
- A country house built of brick will cost much more, but it will be stronger and more durable. However, if such a house is heated or a stove is built in it, then the building can be used even in winter. The process of building a brick house is longer and requires you to have the appropriate skills, although if you wish, such a structure is also easy to build yourself.
- Foam blocks and gas blocks can be a cheaper alternative to brick. In addition to its reasonable price, this material has a low specific weight, which makes it easier to transport and install. A house made of aerated blocks is quite warm, but requires external cladding to protect the walls from moisture, since the material is quite hygroscopic. Provided a heating system is installed, you can also live in such a house in winter.
We should also talk about materials for arranging the foundation. Their choice depends on the design of the walls, the type of foundation, geological and climatic conditions in the region of construction. If we are building a house from piece stone materials (brick, foam blocks or gas blocks), then it is better to choose brick, concrete or reinforced concrete for arranging the foundation. So:
- Under a brick house you will have to make a buried monolithic strip foundation made of reinforced concrete. This is the most expensive option for arranging the foundation. The depth of the foundation base should be below the freezing point of the soil.
- For walls made of lightweight materials (aerated concrete, foam blocks and wood), you can install a shallow strip foundation made of monolithic reinforced concrete, a columnar base made of concrete, stone, factory blocks, steel pipes or processed logs.
- On heaving soils and when building on a slope, it is advisable to make the foundation on screw piles. They are made from steel pipes with a helical blade at the end. Pipes can be screwed into the ground manually. The depth of placement is below the freezing point.
As for the materials for arranging the roof, they are no different from those used in the construction of a traditional residential building. Wooden beams are used for the rafter system, the sheathing is made of boards or OSB (in the case of laying soft roofing material). The roof covering can be made of corrugated sheets, metal tiles, rolled flexible tiles, slate, etc.
Construction technology

Since the most inexpensive country house will be a frame building on a columnar foundation, we will describe step by step how to build such a house with your own hands.
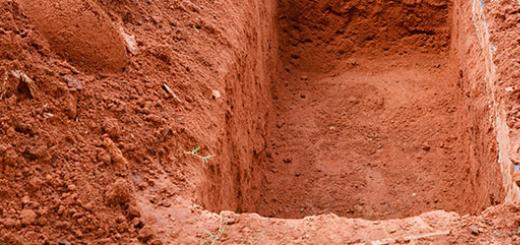
- After preparing the site and marking, we dig holes for the pillars. It is worth noting that the pillars are made under all external and internal load-bearing walls with equal spacing (1-1.5 m). The dimensions of the pillar depend on the material from which it will be made. Brick pillars for a frame house can be 380x380 mm in size.
- After digging holes to a level below the freezing point of the soil, a sand cushion is placed at the bottom. A layer of sand 10 cm high is moistened with water and thoroughly compacted.
- Then pillars of the required height are laid out of brick using cement mortar. The outer surface of the posts is plastered.
- The upper horizontal surface of the pillars is waterproofed with two layers of roofing material.
- Next, the strapping beams (beams 150x15 mm) are laid on the pillars. In the corners they are fastened together and fixed to the posts using anchors or steel brackets.
- We attach logs to the frame beams at equal intervals (70 cm).
- Next we install the wall frame. It can be assembled on the ground and lifted onto a beam or erected directly on the harness. The second option is more suitable for doing it yourself. For the frame it is worth taking bars with a cross section of 50x150 mm. In the corners of the house, double bars are installed to increase rigidity.
- We install vertical frame posts at the location of window and door openings, as well as along the entire plane of the walls with equal spacing.
- After this, the upper strapping beam is mounted. Horizontal frame beams are fixed above the window and door openings. In the corners of the house, to increase the rigidity of the frame, oblique struts are installed on both sides.
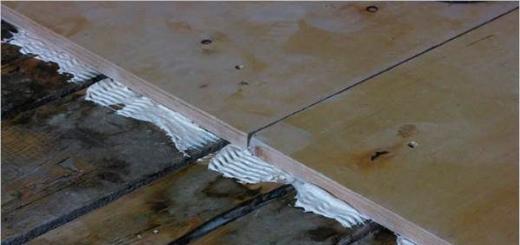
- Now the frame of the house is sheathed with sheet material (OSB, chipboard, moisture-resistant plywood) or clapboard. In the space between the two layers of sheathing (inside the frame) it is worth laying thermal insulation material (mineral wool, basalt insulation, extruded polystyrene foam).
- Let's move on to the construction of the floor. We attach subfloor boards to the joists on the bottom side. On top of them, going around the logs, we lay a waterproofing membrane. Then we put insulation into the gap between the joists. After this comes a layer of vapor barrier and finished floor boards.
- We install floor beams above the vertical posts of the wall frame. For a tight fit, grooves are cut out on their edges. The beams are additionally fixed to the frame with steel corners.
- Now we are installing the rafter system. We fasten the outer pairs of rafter legs on the ground and mount them on the walls as gables. We connect these pairs of rafters using a ridge beam. After this, you can mount the remaining pairs of rafter legs and install them at equal intervals, connecting them to the frame beams and floors.
- Next, a vapor barrier film is spread over the rafters. It is fixed with brackets and counter-lattice slats on the rafters.
- Next, the sheathing is done and the roofing material is laid.
Where does landscaping of a suburban area begin? We propose to consider the option of building a small house with amenities and a terrace, which, after building a full-fledged home, will become an excellent place to relax, store household equipment, or even a cozy guest house.
Inside the house there is a separate bathroom (4), a relaxation room with good natural light (3) and a small shed with an entrance from the outside (1) for storing small items or setting up a mini-workshop. For a pleasant time in the fresh air, we will allocate a place in the plan for an attic (2), approximately 180x260 cm. The overall dimensions of the house are 6x6 meters, just the standard length of the scaffolding.


Foundation tricks
Our construction is based on 16 concrete pillars arranged in a 4x4 square at 2 meter intervals. The marking of the site is carried out with a grid stretched on stakes; from each of the 16 intersections, a mark is transferred with a plumb line to the ground. Four internal wells are dug strictly at intersections, twelve external ones - with an inward displacement of 7 cm.

You can dig by hand, drill with a motorized drill, or use a crane-drilling machine. We drill wells with a diameter of 350-400 mm to the depth of soil freezing plus an additional 50 cm. At the bottom of each well we pour a bucket of crushed stone or river pebbles, then add two buckets (25 liters) of grade 300 concrete with a filler of fraction 5-8. We stick 110 mm plastic sewer pipes (gray PVC) into the solution that has not yet set. We orient them with the sockets up; for long pillars, the pipes can be made prefabricated. We align the pipes vertically, as well as at intersections and the general lacing level, pour 1-1.5 buckets of sand into the pits, and fill the rest with earth.

After the bases have set, we pour the same concrete into the pipes; they can be seated by vibration or pinning. The column is reinforced with a 14 mm profile rod the full length of the pipe; an M12 pin 200 mm long is welded to the upper edge. Such a foundation does not react in any way to winter heaving of the soil: a smooth sleeve around the pillar does not allow the soil to freeze to the concrete.
Grillage and frame floor
A week is given for the pillars to dry. On top you need to stretch a fine (15 mm) chain-link mesh, painted or galvanized, two meters wide. We stretch it on the studs of the pillars, and sew the edges with wire.

Then a grillage made of 150x150 mm timber is assembled on the foundation:
- at intersections we make a half-tree cut;
- use a brace to make 20 mm holes for the studs;
- fold the internal grid of the grillage;
- we place the outer bars horizontally, following the bandaging scheme;
- tighten the nuts over the wide washers until the timber crushes the mesh;
- we finally draw out the general horizontal plane with linings made of roofing felt;
- cut off excess pins.

We attract the mesh to the grillage either with wire, or we hit it from below with galvanized nails. We put a windproof membrane into the cells and turn them high at the edges. Afterwards, the space between the beams is filled with a mixture of wood shavings and slaked lime 5:1 and covered with plastic film, the edges are fixed with staples.

A sheathing is mounted on top of the film: a 50x150 mm board is placed on edge in both directions to form cells of approximately 580x580 mm. There are eleven boards on each side, twenty-two in total. Along the edges and at intersections with grillages, the boards are drilled 70 mm with a 10 mm drill, then pulled to the base with self-tapping screws. The intersections of the sheathing must be carried out as on the grillage - with trimming in half the tree, all cracks and junctions are moistened and sealed with summer foam.

The floor frame, with the exception of cells located entirely under the terrace, is filled with mineral wool and covered with a semi-permeable (150 g/m) diffusion membrane. The floor is laid with edged tongue-and-groove boards over the entire surface. We make ventilation holes in the cells under the terrace in the frame boards.

Walls, corners, openings and junctions
Further work begins with two walls opposite the corner attic. First, on the flat base of the house, we lay out and assemble on self-tapping screws a frame of boards on edge with external dimensions of 570x240 cm. To the assembled frame we add 2.4 m of racks from 24x150 mm boards with an interaxial pitch of 60 cm. We do not throw away the short pieces from the racks, but cut them along 60 cm. We will use these short boards as horizontal crossbars in the frame for joining the sheathing.
We raise the wall vertically and temporarily attach it to the base with mitered boards. The bottom board of the wall frame is attached with 120 mm dowels to the ribs of the floor system every 40 cm. The second wall is assembled in the same way and installed perpendicular to the first, temporarily tied together with gussets.

Please note that the outer corner is “empty”. We cover it with foam, insert a 60x60 mm beam, and screw the outer boards of the two walls to it, having previously made holes for 100 mm self-tapping screws.

We assemble the remaining walls in the same way, the internal corner is processed in the same way as the external one. From the outside we sheathe the house with 12 mm OSB sheets 2400 long, so the vertical seams fall exactly on the centers of the racks. Place the sheets 200 mm above the wall frame; at the bottom, the sheathing goes down to at least the middle of the grillage. At the corners, the edges follow the frame of the adjacent wall.

When one side has been sewn up, we roll a 40x40 mm block along the vertical edge from the inside and fill the remaining space with foam. From the same corner we begin covering the next wall, screwing the edges of the sheets to the connecting bar.

To form doorways, choose a 50x150 mm board and knock down an installation box from it with internal dimensions of 100x210 cm for the entrance door and 80x210 for the internal ones (with a door width of 70 cm). Before installation, the vertical wall post is cut out completely (can be divided into 4 crossbars); after installing the box, 35 cm liners from boards are added on top of its vertical posts.

Window blocks with an opening width of less than 60 cm are formed by adding horizontal crossbars. The block for a wide window is assembled from a 150x50 mm board and inserted into the frame in the same way as a door, but in this case, fragments from at least two racks must be cut out for it, and the T-shaped junctions must be reinforced with gussets.

Everything you need to know about roofing and attics
To escape the cold and heat, the ceiling must have a layer of mineral wool insulation at least 200 mm thick. In this case, it is better to make the roof single-pitched and ventilated. There may be an attic, but only as a room for storing materials with a useful height of 40-60 cm.

From a 150x50 mm board we assemble trapezoidal single-pitch rafters with a height of 60 cm in the rear and 110 cm in the front. Two six-meter trusses are installed above the “full” part of the house, and five more will be installed above the attic.
To obtain sufficient rib width, a counter-lattice made of 50x50 mm timber is screwed onto the lower rafter boards with self-tapping screws. The top board of the truss turns out to be longer than six meters due to 40 cm overhangs in the front and back of the house. Therefore, you will have to either splice the existing timber with the overlays, or import a longer one. Vertical jumpers are installed one and a half meters from the low edge of the trusses. The rafters are also strengthened with similar racks in the front part, but they are placed exactly above the walls under the direct lining of the terrace from the floor to the roof. The entrance to the attic is located in its widest part - in the inner corner of the terrace.

Attach the rafters to the wall frame, adjusting the solution of the latter in the upper part. Then add intermediate floor beams between the rafters from a 150x50 mm board with a 50 mm counter-batten. Hem the ceiling with OSB 9 mm thick and screw the external cladding of the house to the ends of the ceiling. Fill all joint gaps with summer foam, then place a vapor barrier and mineral wool into the ceiling, and nail a windproof, vapor-permeable membrane on top. Cover the attic floor with 12 mm OSB sheets, cutting grooves for the rafters. Along the vertical crossbars in the rafters, cover the vertical walls of the attic with OSB boards and insulate them as desired. Cover the rafters with plastic film and lay a cold roof made of metal tiles or corrugated sheets.
Interior and exterior finishing
In conclusion, we will give recommendations on finishing work. Outside, you have a flat plane with hidden posts every 60 cm. Therefore, both plastic siding and the block house will fit perfectly.
For interior decoration, drywall suggests itself, but attaching it directly to the studs would be a mistake: the wooden frame will move a lot and cracks will appear. The walls can be sheathed with OSB, followed by upgrading with MDF panels or clapboard. If you still intend to use drywall, prepare the profile frame according to all the rules.