Canva has over 8,000 templates to help you create posters quickly. The service allows you to customize the background and add text, uploaded images, as well as illustrations and other decorations from the Canva library to your posters. Some templates and decorative elements are available for free, others can be purchased individually or received as part of a paid subscription.
Canva is available as a web editor and an iOS app. There is no version for Android yet.

This editor is as powerful as Canva. With Desygner, you too can create posters and other graphics by combining images, text, stickers and other decorations on one canvas. offers hundreds of free templates, illustrations and stock photos. To gain access to the full collection of materials, as well as convenient search through them, you need to subscribe to a paid subscription.
Desygner can be used in the browser and mobile apps on Android and iOS.
3. Fotor

Fotor is a multifunctional service for working with graphics. It allows you to do approximately the same as the poster editors listed above: upload images, overlay text, stickers and other elements on them.
And even more: Fotor has many tools for editing images and creating collages. However, the service does not have as many source materials as Canva and Desygner. By subscribing to a paid subscription, you will receive more sources and functions for editing graphics.
Fotor is available in the browser and as programs for major desktop and mobile platforms.

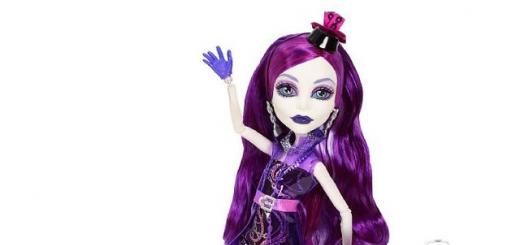
The Bambinic project deserves special attention. This is not a universal poster editor, but a highly specialized service designed for creating children's metrics. For this purpose, Bambinic has several templates with cartoon illustrations and memorable captions. To create a bright poster for your child, you just need to select a template and fill it out, indicating information about the child (for example, number of teeth, height, weight, first words).
Bambinic exists only as a website; the service has no applications.
The process of creating a poster can seem quite challenging, especially if you would like to see it in modern styles. Special online services allow you to do this in just a few minutes, but you should understand that in some places registration may be required, and in some places there is a set of paid functions and rights.
You can create posters online for amateur printing and/or distribution on social networks and on various websites. Some services can help you do this job at a high level, but you will have to use specially designed templates, therefore, there is not much room for creativity. Plus, working in such editors only implies an amateur level, that is, there is no need to try to work professionally in them. To do this, it is better to download and install specialized software, for example.
Method 1: Canva
An excellent service with wide functionality both for photo processing and for creating high-level design products. The site works very quickly even with a slow Internet connection. Users will be pleased with the extensive functionality and a large number of pre-prepared templates. However, to work in the service you need to register, and also take into account that certain functions and templates are available only to owners of a paid subscription.
Step-by-step instructions for working with poster templates in this case look something like this:
- Click on the button on the website "Get Started".
- Next, the service will prompt you to go through the registration procedure. Choose a method - "Register via Facebook", "Register via Google +" or “Log in with your email address”. Authorization via social networks will take a little time and will be done in just a couple of clicks.
- After registration, a questionnaire may appear with a short survey and/or fields for entering personal data (name, password for the Canva service). On the last questions it is recommended to always choose "For myself" or "For learning", since in other cases the service may begin to impose paid functionality.
- Afterwards, the primary editor will open, where the site will offer training in the basics of working in a reactor. Here you can skip the tutorial by clicking on any part of the screen, or go through it by clicking on "Find out how to do it".
- In the editor, which opens by default, the A4 sheet layout is initially open. If you are not satisfied with the current template, then do this and the next two steps. Exit the editor by clicking on the service logo in the upper left corner.
- Now click on the green button "Create design". All available size templates will appear in the central part, select one of them.
- If none of the proposed options suits you, then click on "Use special sizes".
- Set the width and height for the future poster. Click "Create".
- Now you can start creating the poster itself. By default you have a tab open "Layouts". You can choose a ready-made layout and change pictures, text, colors, and fonts on it. Layouts are fully editable.
- To make changes to the text, double-click on it. At the top, the font is selected, the alignment is specified, the font size is set, and the text can be made bold and/or italic.
- If there is a photo on the layout, you can delete it and install one of your own. To do this, click on an existing photo and press Delete to remove it.
- Now go to "My", which is in the left toolbar. There, upload pictures from your computer by clicking on "Add your own images".
- A window for selecting a file on your computer will open. Select it.
- Drag the downloaded image to the photo space on the poster.
- To change the color of an element, simply click on it a couple of times and find the colored square in the upper left corner. Click on it to open the color palette and select the color you like.
- When you're done, you need to save everything. To do this, click on "Download".
- A window will open where you need to select the file type and confirm the download.


The service also gives you the opportunity to create your own, non-template poster. This is what the instructions will look like in this case:

Creating a poster in this service is a creative endeavor, so study the service interface, perhaps you will find some other interesting functions or decide to use paid features.
Method 2: PrintDesign
This is a simple editor for creating printed layouts. There is no need to register here, but you will have to pay about 150 rubles to download the finished result to your computer. It is possible to download the created layout for free, but it will display the service’s watermark logo.
On such a site it is unlikely that you will be able to create a very beautiful and modern poster, since the number of functions and layouts in the editor is very limited. Plus, for some reason there is no built-in layout for A4 size.
When working in this editor, we will only consider the option of creating from scratch. The thing is that on this site there is only one example of templates for posters. The step-by-step instructions look like this:
- Scroll down the main page to see a full list of options for creating printed products using this service. In this case, you need to select the item "Poster". Press “Make a poster!”.
- Now select the sizes. You can use templates or set your own. In the latter case, you will not be able to use a template that is already included in the editor. In this instruction we will look at creating a poster in A3 size (instead of AZ it can be any other size). Click on the button "Make it from scratch".
- The editor will then begin loading. To get started, you can insert a picture. Press "Image", which is located in the top toolbar.
- Will open "Conductor", where you need to select a picture to insert.
- The uploaded image will appear in the tab "My Images". To use it in your poster, simply drag it onto the work area.
- The picture can be resized using special nodes located at the corners, and it can also be freely moved throughout the workspace.
- If necessary, set the background image using the parameter "Background color" in the top toolbar.
- Now you can add text for the poster. Click on the tool of the same name, after which the tool will appear in a random place on the workspace.
- To adjust the text (font, size, color, highlighting, alignment), pay attention to the central part of the top toolbar.
- For variety, you can add a few additional elements, such as shapes or stickers. The latter can be seen by clicking on "Other".
- To view the set of available icons/stickers, etc., simply click on the item you are interested in. After clicking, a window will open with a complete list of elements.
- To save the finished layout to your computer, click the button "Download", which is at the top of the editor.
- You will be redirected to a page where the finished version of the poster will be shown and a check for the amount of 150 rubles will be provided. Under the receipt, you can select the following options − "Pay and download", “Order a print with delivery”(the second option will be quite expensive) and “Download PDF with watermarks to view the layout”.
- If you chose the latter option, a window will open where a full-size layout will be presented. To download it to your computer, click on the button "Save", which will appear in the address bar of the browser. In some browsers, this step is skipped and the download starts automatically.


Method 3: Fotojet
This is also a specialized design service for creating posters and placards, similar in interface and functionality to Canva. The only inconvenience for many users from the CIS is the lack of Russian language. To somehow remove this drawback, it is recommended to use a browser with an auto-translation function (although it is not always correct).
One of the positive differences from Canva is that there is no mandatory registration. Additionally, you can use paid elements without purchasing an extended account, but such elements of the poster will display the service logo.
Step-by-step instructions for creating a poster using a prepared layout look something like this:
- Click the button on the website "Get Started" to get started. Here you can additionally get acquainted with the main functionality and features of the service, although in English.
- By default, the left panel has a tab open "Template", that is, layouts. Choose the most suitable one from them. Layouts marked with an orange crown icon in the top right corner are only available to paid account holders. You can also use them on your poster, but a significant part of the space will be taken up by the logo, which cannot be removed.
- You can change the text by double-clicking on it with the left mouse button. Additionally, a special window will appear with a choice of fonts and settings for alignment, font size, color and bold/italics/underline.
- You can also customize various geometric objects. Just click on the object with the left mouse button, after which the settings window will open. Go to the tab "Effect". Here you can adjust the transparency (item "Opacity"), boundaries (point "Border Width") and fill.
- You can consider the fill setting in more detail, since you can completely disable it by selecting "No Fill". This option is suitable if you need to highlight an object with a stroke.
- You can make the fill standard, that is, one color covering the entire shape. To do this, select from the drop-down menu "Solid Fill", and in "Color" set the color.
- You can also set a gradient fill. To do this, select from the drop-down menu "Gradient Fill". Under the drop-down menu, select two colors. Plus, you can specify the type of gradient - radial (coming from the center) or linear (going from top to bottom).
- Unfortunately, you cannot replace the background in layouts. You can only add any additional effects to it. To do this, go to "Effect". There you can select a ready-made effect from a special menu or make settings manually. For independent settings, click on the inscription at the bottom "Advanced Options". Here you can move the sliders and achieve interesting effects.
- To save your work, use the floppy disk icon in the top panel. A small window will open where you need to give the file a name, its format, and select the size. Users who use the service for free have only two size options available - "Small" And "Medium". It is noteworthy that here the size is measured by pixel density. The higher it is, the better the print quality will be. For commercial printing, it is recommended to use a density of at least 150 DPI. After completing the settings, click on "Save".


Creating a poster from scratch will be more difficult. This manual will cover other main features of the service:

As you know, a poster is much larger in size than a simple A4 sheet. Therefore, when printing on a printer, you need to connect the parts to get a solid poster. However, doing this manually is not very convenient, so we recommend using software that is great for such purposes. We will look at several of the most popular representatives in this article and talk about their functionality.
RonyaSoft develops various programs for working with graphics and images. A poster designer occupies a separate niche. Poster Designer has a list of different templates that will help you create a project faster and better, and you can also edit the banner in detail on the work area by adding various details.

There is a wide range of tools and clipart templates. In addition, immediately after creation, you can send the poster to print, after making some settings. If it is large in size, then you will need the help of another program from the same company, which we will consider below.
RonyaSoft Poster Printer
It is not clear why the developers could not combine these two programs into one, but this is their business, and users can only install both of them in order to comfortably work with posters. Poster Printer is intended exclusively for printing finished works. It helps to correctly break it down into parts so that later everything will be perfect when printed in A4 format.

You can customize the optimal size for you, set the margins and borders. Follow the established instructions if you are using such software for the first time. The program is available for download for free from the official website and supports the Russian language.
Posteriza
This is a great free program that has everything you need when creating a poster and preparing it for printing. It is worth noting that you can work with each area separately; to do this, you just need to select it so that it becomes active.

You can add text, various details, images, set margins and adjust the size of the poster before sending it to print. You just have to create everything from scratch, since Posteriza does not have established templates to guide you when creating your project.
Adobe InDesign
Almost every user knows Adobe for its world-famous graphics editor. Today we will look at InDesign - the program is great for working with images, which will then be divided into parts and printed on a printer. By default, there is a set of canvas size templates that can help you choose the optimal resolution for a specific project.

It is worth paying attention to the wide range of tools and various functions that you will not find in other programs. The work area is also made as convenient as possible, and even an inexperienced user will quickly get used to it and will not feel discomfort while working.
Ace Poster
A simple program whose functionality includes preparing a poster for printing. It does not have any additional tools, such as adding text or applying effects. You might think that it is only good for one function, because it is.

The user only needs to upload a picture or scan it. Then specify the dimensions and send for printing. That's all. In addition, Ace Poster is distributed for a fee, so it is better to consider testing the trial version before purchasing.
Canva has over 8,000 templates to help you create posters quickly. The service allows you to customize the background and add text, uploaded images, as well as illustrations and other decorations from the Canva library to your posters. Some templates and decorative elements are available for free, others can be purchased individually or received as part of a paid subscription.
Canva is available as a web editor and an iOS app. There is no version for Android yet.
This editor is as powerful as Canva. With Desygner, you too can create posters and other graphics by combining images, text, stickers and other decorations on one canvas. offers hundreds of free templates, illustrations and stock photos. To gain access to the full collection of materials, as well as convenient search through them, you need to subscribe to a paid subscription.
Desygner can be used in the browser and mobile apps on Android and iOS.
3. Fotor
Fotor is a multifunctional service for working with graphics. It allows you to do approximately the same as the poster editors listed above: upload images, overlay text, stickers and other elements on them.
And even more: Fotor has many tools for editing images and creating collages. However, the service does not have as many source materials as Canva and Desygner. By subscribing to a paid subscription, you will receive more sources and functions for editing graphics.
Fotor is available in the browser and as programs for major desktop and mobile platforms.
The Bambinic project deserves special attention. This is not a universal poster editor, but a highly specialized service designed for creating children's metrics. For this purpose, Bambinic has several templates with cartoon illustrations and memorable captions. To create a bright poster for your child, you just need to select a template and fill it out, indicating information about the child (for example, number of teeth, height, weight, first words).
Bambinic exists only as a website; the service has no applications.
Very often, marketers use posters in their advertising campaigns. Let's look at how to make it, what to pay attention to when designing, and where it's best to place it.
The poster is real art. Marketers, designers and artists around the world compete in the beauty, effectiveness and uniqueness of their masterpieces.
But creating a poster is not as easy as it might seem. Designers need to consider a ton of details both during the creation process and after. We read, save and learn new things.
What is a poster
Posters are not just beautiful images of celebrities that everyone put on their walls when they were kids. In a broad sense, poster- a catchy image with a short text, made for propaganda, advertising or educational purposes.
A modern poster is primarily associated with advertising, which is not entirely true. Information and design posters are no less popular.
Informational The poster is most often found in the form of various posters. The main purpose of such posters is to convey important cultural information to the audience and announce events.
You can also use specially made posters for decoration.
History of the poster
Despite the fact that the first “traces” of posters are found in Ancient Egypt (images with information about escaped slaves), it is still customary to call the artist the father of the poster. The Frenchman, according to many, is an artist of relatively small talent, which, however, did not prevent him from becoming the creator of a new genre. In 1866, he opened a workshop for the production of lithographic paintings, which was the beginning of the poster.
The posters clearly explained why alcohol is harmful to humans.


 Alcohol increases the risk of accidents
 It's better to have short hair than to lose it
 The casing was too high


How to make a promotional poster
Vivid image
As they call it in marketing - eye-stopper. The main task is to attract attention and arouse curiosity. A non-standard image or a bright picture can act as an eye-stopper.
Use one image and don't forget that the poster will be large, so the picture should also be of good resolution!
Heading
The title is optional, but in most cases it won't hurt. Like a picture, it should attract attention, which means it should be read from a distance.
The title can be the name of a promotion, the name of a product, or a message about a sale.
Text
The less text, the better. The font should be large. When arranging the text, you need to highlight the trademark and logo.
Use no more than two fonts: one for the body text, the second for the title.
Color
Choose bright, contrasting colors. Contrasting shades work better together and make the poster easier to read.
Thomas Russell, a lecturer at the Institute of Contemporary Studies at the Advertising Agencies Association, shares his tips for creating an advertising poster.
- Simplify. Posters should immediately grab attention and quickly convey the main idea.
- Show the benefits of the product.
- Use the power of color. The brighter the advertisement, the better. In moderation.
- Avoid ambiguity. Not everyone can immediately understand your game, accept it and react positively. If you are not 100% sure, it is better not to use ambiguous images and texts.
- The text should be as light and easy to read as possible.
10 signs of a good advertising poster
How and where to place posters
The placement of the poster depends on its type. If this is an advertising poster, then first of all it is placed on the street: special stands, walls of buildings, fences, bus stops - wherever it would be noticed by as many passers-by as possible. It is important that nothing around distracts from the poster or interferes with it. He should be the center of attention.
The same applies to an information poster, for which the main thing is to reach a large audience.
Another thing is decorative posters. Here are some tips for placing them.
Posters look best on plain surfaces. And it doesn’t matter where exactly: in the living room, in the kitchen, in the bathroom or in a restaurant.
In addition, posters can be placed on the wall in different ways.
Horizontal row.
This way you can fill any empty space.
Collage of four posters.
This placement is perfect for rooms with high ceilings.

Symmetrical arrangement.
If you have several posters of the same size, symmetry is for you. In addition, it will help visually balance the interior of the room.
Asymmetrical arrangement.
For such placement it is better to use posters of different sizes. Posters can be hung however you like.

Poster designers
If you try, you can easily make a poster yourself, without even resorting to the help of designers. Check out the very convenient and multifunctional tools for creating posters.
An excellent resource for creating not only posters, but also banners, business cards and various illustrations. You don't need any special skills to draw a cool poster.
A wide range of tools and capabilities for both drawing and image editing. And numerous templates will facilitate and speed up the process.

Online editor. Canva is slightly inferior in its set of tools and templates. However, it is great for quickly creating a simple poster.

Especially for those who want to create their own movie posters!